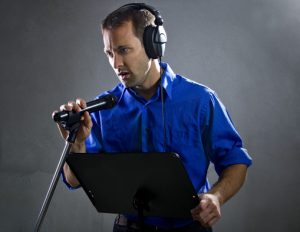
5 Questions to Ask Yourself When You Need Something Transcribed

You’ve got an audio or video recording, and you need it in written format.

You need it transcribed. That sounds simple enough, right?

Get your recording transcribed. Done!

But now that you know you need transcription, the questions start flooding your brain, and you don’t know where to start.

  • How do you go about getting speech transcribed?
  • What if the content is in a language other than English?
  • Is there more to it than just writing down what you hear?

Suddenly, you start to realize that converting speech to text might actually be more complicated than you thought.

You ask yourself… “What’s next? Where do I go from here?”

If you made it this far, continue reading.

I will share with you what I learned working on hundreds of transcription projects over the years.

First thing to do is to have an understanding that you need something transcribed.

Once you know you need transcription, here is a list of 5 questions to ask yourself before getting started.

1. Why do I need a transcript?

This is an important first question, because it will color the approach to your project and what you ask your service provider for.

Maybe you have an English training video for which you need subtitles and voice-overs in multiple languages.

Or maybe you have a voicemail message in Russian, and you just need to understand what it said.

Perhaps you have a video of a focus group that was conducted in Spanish, and you need that content in English to refer to for data analysis.

You may even have a recording of a customer service call which needs to be translated and added to the customer’s file.

Lastly, you may have a witness/suspect interview which must be transcribed to be submitted into evidence for a court case.

The are many more use cases for transcription. The ones listed above are some of the more common ones.

Once you establish your use case (why you need something transcribed) for transcription, contact an expert.

2. Who should I contact?

Depending what you need, you might be surprised to find that your LSC (Language Services Company) may be able to help!

Especially (but not exclusively) when the audio is in a language other than English.

Alternatively, you can reach out to freelance professionals or transcription companies specializing in your subject matter.

Regardless of how you approach getting your content transcribed, make sure you find a qualified vendor.

3. How is transcription priced?

If you read this far, you are probably still in the research phase.

You may not be ready to contact a transcription service provider, but you would like to get an idea of how much it will cost you to have your content transcribed.

Read on!

There are several ways that transcription can be priced. For monolingual transcription (ex. English speech into English text, or Spanish speech into Spanish text), you’re likely looking at simple per-minute pricing.

For transcription combined with a translation need (ex. Spanish speech into English text), you will still see per-minute pricing, but you may see add-on charges as well, depending on how your LSC has structured their rates.

Some LSCs provide all-inclusive pricing for transcription + translation. If they do, the per-minute rate will be higher, but you won’t see any add-on charges for translation. The price you see is the price you pay.

Other LSCs charge per minute for monolingual transcription and separate out the translation as a per-word price. This method introduces some unpredictability in the project scoping phase, because in this case, your pre-project estimate will include an estimated word count for translation. Once the transcription step is completed, you’ll get updated translation pricing with the actual word count, which could go up or down depending on the transcribed output.

If you are looking for a ballpark cost in dollars, check out this page and scroll down to the Sample Pricing section.

4. What kind of script do I need?

Now that you know why you need something transcribed, who can potentially help you, and approximately how much it will cost, you can dive deeper to determine what kind of script you will need.

This question is one you may not think to ask yourself, but once you dive in, you’ll find the options are very different and the type of script you need may be very clear.

If not, your LSC can help you decide which is the best fit.

If your audio is in English, the answer can be easy!

  • Monolingual Script – This option is for a transcript which is in the same language as the spoken audio. For example, English speech will result in an English transcript. Or, Spanish text will result in a Spanish transcript.
  • Subtitle/Caption-Ready Script – If you need captions or subtitles, let your LSC know before they start working on your project! Depending on your intended use/video format, there may be special script formats that are required.

Let’s say you conducted a focus group was done in Spanish and you need the audio in written English. In this case, you are looking at a transcription + translation project. For this type of project, you have two choices:

  • Bilingual Script – This is the more thorough option, providing you with both the transcribed speech in the original spoken language (ex. Spanish), as well as the corresponding written translation (ex. English). Typically, you would receive a bilingual table with the Spanish in one column and the English translation in the second column. For recordkeeping, reference, audit, and quality assurance purposes, this method is a safe bet.
  • Monolingual Translated Script – This option provides you with only the translated text. To produce this, the linguist would listen to the Spanish and write the translation in English without ever writing down the transcription of the Spanish. This method might be preferred for a short recording, like a voicemail, or for cases where you do not expect to need to refer back to the original language/content.

These are the most frequently encountered script types we work with on a daily basis.

5. What else should I consider when having my content transcribed?

Here are some additional things to consider for transcription.

Once you have the structure of your script figured out, you’re ready to decide what – if any – additional services you need. Some of those services include:

  • Time stamps – These can be useful if you plan to refer back to the audio recording while reading the transcript. For example, if you want to refer back to a specific conversation from your focus group, you’ll be able to look at your transcript and know exactly where to push play on your recording. Time stamps can be included in-line, or as an additional column in your transcript.
  • Inclusive/exclusive of background noise or nonverbal audio/actions – There are many reasons you may need background noise included. Perhaps you plan to create Closed Captions on a video from your script for the Hearing Impaired, or perhaps there was background noise/action in an audio recording that impacted the conversation which must be documented for a court case. Alternatively, you may need to “clean up” your script for voice-overs and remove grunts or “umms” from the speech so your script is easy to read and free of disruptions.
  • Identification of speakers – In the case of multiple speakers, it can be helpful to include the names of speakers in your transcript. If names are unknown, the transcriptionist can indicate “(fe)male 1”, “(fe)male 2”, etc. This information can be included in an additional column in your transcript.
  • Multilingual Translation – If your monolingual English script is being used for subtitles/captions or voice-overs, you may find yourself in need of translation into multiple languages so you can provide access to your video content in the end-user’s native language.
  • Subtitles/captions – If you know going into your project that you are going to need subtitles or captions for your video content, let your LSC know right away. This additional service may actually change the approach to your project entirely! The structure of the script may change, and if the subtitles/captions are to be translated, the linguists will have to translate differently to accommodate for space limitations.
  • Voice-over – You may need voice-over services to add recorded speech onto a video project where the original video was in English and the new voice-overs are in various other languages. Similar to subtitles and captions, voice-over work is a complex additional service. In addition to the extra work that goes into recording a voice-over, the translations must be carefully thought out to fit in the available time in the video.
Conclusion

Transcription is a concept that is much more complicated and involved than you might think. The project approach, structure of your script, and necessary additional services can vary vastly depending on the intended use.

The good news is that you are not on your own – there are resources out there to help you navigate all of the options and variations, so you get exactly the right transcript for your needs.

NWI Global provides professional transcription services. Get in touch with us to talk about having your content transcribed.

How Visual Design Plays a Role in eLearning Localization

A Roadmap for Instructional Designers

Earlier this month I attended and participated in the Learning Solutions Conference & Expo in Orlando.

Even though I was there on behalf of NWI Global, exhibiting at the expo, I couldn’t pass up the opportunity to learn something new. It was a great place to learn, with so many training and eLearning professionals sharing ideas.

One of the topics that intrigued me in particular was a Crash Course in Visual Design, presented by an industry expert, Connie Malamed.

A Crash Course in Visual Design

Visual design is a fundamental part of eLearning and has a direct effect on how the audience will accept the course content.

But as an instructional designer, you already knew that, right?

My goal is to teach you something new in this article, so you can feel more confident in your design process for multicultural audience. Specifically, I will show you how visual design plays a role in eLearning localization.

The Purpose of Visual Design

According to the Social Science Research Network, 65% of people are visual learners. That means more than half of your organization’s customers and employees prefer visual content over other media.

Visual design will be integrated in your eLearning content and the main purpose behind it is to make things easy to understand for your audience. That will lead to increased knowledge acquisition and retention rates.

Make things less confusing

If you are a global organization, your customers and employees may not necessarily speak English. To further increase knowledge acquisition and retention rates for those customers and employees, you need to deliver your eLearning content localized for the target audience.

Where Do I Start?

Plan ahead.

I know what you’re thinking… boring!

And I agree with you. Sometimes I just want to do and not plan.

You have these great ideas and are ready to put them in practice.

There are even awesome Captivate and Storyline templates you can download to get things done more efficiently.  And you believe you are ready to localize your English training content into other languages.

Why not get things started now?

Planning is a good thing

“Can’t you just translate this quickly for me?” is the question that you are ready to ask your translation vendor and get the project over with.

After all, planning is a boring task at times. Visual design is fun.

But to make your training course successful, I urge you to consider planning as the first step.

You may end up having to go back to the drawing board with your English content to make it localization-friendly, but it will be worth it.

Here are some sample questions to ask your stakeholders during the planning stage:

  • Are we trying to reach a broader eLearning audience?
  • Are we positioning our brand for global success?
  • How do we ensure consistent and reliable results from our training content?
  • Do we need to make our content accessible for the Deaf and hard of hearing individuals?
  • Have we researched the cultural background of our target audience?
  • Are we targeting global in-country markets or are we focusing on the U.S.-based LEP (limited-English proficient) population?
  • What is the reading level of our target audience?

The questions above will help you get in the right frame of mind when planning for localized eLearning content.

Not only will a solid eLearning localization plan help set your audience up for success, it will also save your company money.

Don’t be an organization that never has the time or money to do it right the first time, but always has the time and money to do it over and over again.

Plan and do it right the first time.

Components of Visual Design

Now that you have a plan in place for localizing your eLearning content, let’s take a look at some of the components of visual design.

It’s important that you think about these components as you design your source materials in English before having your translation vendor start on the localization process.

1. Images, Graphics & Photos

Pay attention to cultural relevancy of images, graphics and photos. What’s considered appropriate in the United States, may come off as offensive in other countries.

Localizing text during the translation process is a standard process. Localizing images, graphics & photos is often overlooked. Your translation vendor may be able to help with this aspect if you don’t know where to start.

Photographer in action

If your audience is factory workers in Mexico, I’d consider using actual photos of factory workers in Mexico in the visual design of the scenario. The workers will then be able to relate to the content more, because they can now visualize themselves in that scenario.

Some cultural imagery considerations include body positions, social contexts, symbols and aesthetics.

Another aspect to consider is how the members of your target audience see themselves. Are they individualistic or collectivistic? Your content should appeal to them.

When working with images, graphics and photos, always take the layered approach. In Photoshop, you can save layered files in PSD format. Other applications have similar options.

Layers in Adobe Illustrator

Using this approach will not only enable you to update the graphical content easier should the training content need to be updated in the future, your localization vendor will also be able to produce a higher quality product in the target languages by having access to the layered files.

Put it in practice: If you think something is funny, effective and politically correct, consider other points of view. Chances are others won’t have the same views as you. This is especially true for other cultures, and you’ll want to be sensitive to your audience’s perspectives. Additionally, always keep layered files handy when working with visual elements, and be ready to provide them to your localization vendor.

2. Fonts & Text

As you create your source content in your preferred authoring tool, be sure to use fonts that are translation-friendly. To make this easy, stick to Unicode fonts. Unicode is one of the best standards available for localized fonts.

You should also make sure that the LMS (Learning Management System) you will be working in can support multilingual content. Some systems are designed to serve only English-speaking audiences or the Latin script. Such systems are probably not right for you if you are localizing your training content.

Different types of fonts

When choosing fonts, focus on simplicity. Avoid non-standard fonts. The main reason behind this is the accent marks that certain languages have. For example, Spanish and Vietnamese have accent marks that are not supported by all fonts, as most fonts were developed with English characters in mind, and non-English symbols, accents and characters will not work. Arial and Times are usually a safe bet for the majority of languages.

Finally, either embed the fonts into your project file or be prepared to provide them to your localization vendor as standalone files. Don’t assume your localization vendor will have the fonts you’re using in the source file.

Put it in practice: Use standard Unicode fonts when possible. Embed the fonts into your source files or provide them as standalone files. Make sure the LMS you’re designing for has multilingual support for a better user experience.

3. Colors

The psychology and cultural relevancy of colors is an important factor in visual design. Colors should be used properly and within proper context.

People from different cultures see colors differently and there are certainly emotional meanings tied to their perception.

Localize colors to send a positive brand message

The color blue is probably the safest color you can use, but what if it doesn’t fit your content? You may have to do more research before implementing a color scheme for your multicultural audience.

Ultimately, whatever colors you choose the tasks you should be trying to accomplish include evoking the sense of trust, tranquility and knowledge retention.

Put it in practice: Never assume that the color scheme you are using for U.S.-based target audience will work in another country or culture, even if it’s your brand’s colors. Research your target audience and pick the colors that will appeal most to them.

4. Layout & Space

As you create and layout your eLearning content always remember that white space is your friend.

This is especially important once you have the source text translated into other languages. Some languages expand in volume, where others contract. Spanish, for example, will take up about 25% more space than English. That could really impact the look and feel of the design you originally intended to produce.

In other words, it may look great in English, but lose its design quality in Spanish. Working with the same layout and space, you’d either have to scale the font size down to fit the Spanish translation or have it overflow to another frame or slide. It is better to use caution and leave more white space if you’re unsure whether your target language will expand.

Content layout

When organizing your text content around the graphical elements, be mindful of the symmetry and how the graphics are positioned in relation to the text.

Lastly, practice subtractive design. As Connie Malamed points out, “remove, remove until only necessary is left.” Sometimes less is more.

Put it in practice: Think about text expansion and contraction in the languages your eLearning content will be translated into. Plan your design layout and space with the text content in mind. Ask your localization vendor for expansion and contraction charts for your target languages, so you are aware of those factors as you design the source content.

5. Audio & Video

Your eLearning modules may contain audio and video components. You probably won’t be handling the production of A/V content yourself and will outsource it to a professional instead.

Here are some visual design aspects to consider to make your A/V content localization-friendly.

When it comes to video bumpers and superimposed graphics, think in layers as well. Adobe Premiere allows for a video project to be saved with all video and audio assets as separate files. Your localization vendor will ask for these assets to complete the localization process.

Audio recording in a studio

To make the video truly accessible not only for the Deaf and hard of hearing individuals, but also for audience who don’t speak English, make sure to include captions or subtitles.

From a design perspective, keep the things you just learned about in mind. That includes the use of photos, images, graphics, fonts, colors and whitespace. And if you plan to include captions or subtitles, try to keep the bottom third of the screen free of other text so there is room for the captions/subtitles.

Audio is not directly related to visual design, but because it goes hand-in-hand with video content, it could very well be a part of your eLearning content. Learn more about audio localization in this article.

Put it in practice: Localized audio and video content will take your eLearning modules to the next level. Consider integrating A/V in your training modules.

6. Scenarios

The five components I discussed above all play a part in the training scenarios you design.

Make sure that scenarios and real world examples are relatable and relevant. If your audience can’t relate to your training content, they won’t have a good learning experience.

Factory scenario

If your content is centered on safety training for factory workers in Mexico, be sure your translation vendor is aware of this so they can utilize the appropriate terminology. Using technical terminology intended for academic users may not be appropriate for factory workers who would prefer the terminology they encounter on a daily basis.

If the trainees can relate to your scenarios, they are more likely to succeed in training. Retention rates will increase and there will be less on-the-job injuries.

Put it in practice: Have your translation vendor provide an in-country review by a subject-matter expert who can offer his or her opinion. If your budget allows it, conduct a small focus group with a few select trainees to test the scenario as well. This will allow you to fine-tune the scenario content before going live.

Need help translating and localizing your eLearning content?

Let’s discuss your specific needs.

Contact us.

Conclusion

I learned a lot at the Learning Solutions Conference & Expo this year and look forward to many industry events. One of the biggest takeaways for me was how to effectively use visual design.

Hanging with Gene at LS Con

I also hope you learned something new from reading this article.

Now you can take your knowledge of visual design and use the tips I provided to you about eLearning localization and set your trainees up for success.

What is your experience with visual design and eLearning localization?

Share your thoughts in the comments.

What You Need to Know About Audio Localization

There may come a need in your organization where you have to take an audio content piece recorded in English and have it localized into Spanish, or perhaps into another language.

Where do you start? I will show you!

If you are new to audio localization, you should know what it means first. Audio localization is different from sound localization. Sound localization refers to a listener’s ability to identify the location of a sound in direction and distance.

Audio localization is the process of taking sound content, especially when recorded, transmitted or reproduced, and adapting it to a specific locale or market. Audio localization oftentimes includes language translation as a part of the process.

Read on to find more about the audio localization process how it can be applied within your organization.

Business Applications for Localized Audio

How do you integrate audio localization in your business? Here are three examples.

1. Learning Courses

You have your training content developed in English, which is great for your English-speaking customers and employees. But what about customers and employees that speak other languages?

Localization of eLearning Courses

According to Christopher Pappas, one of the benefits of localized eLearning courses is the increase of knowledge acquisition and retention rates. That in turn, should lead to happy customers and employees.

2. Commercials

Nielsen’s Hispanic Radio Today study says that radio has a near-universal reach among Hispanic consumers. Those consumers are also huge spenders in many key retail categories. One of the best way to reach those consumers is through radio commercials that are recorded in Spanish.

Localizing audio for radio commercials

Where does localization come in? Spanish speakers in California, Texas, the New England states and Puerto Rico will all require a unique marketing approach. Your audio content will need to be localized based on those specific target markets.

3. IVR – Interactive Voice Response

Your organization uses telephones to communicate and most likely a phone tree to go along with them, right? The recorded prompts in that phone tree are in English, but you can also have them recorded in other languages to help you deliver a better customer experience.

Localized IVR phone tree for a call center

Through IVR technology, you can set up multilingual appointment reminders, payments, polls, and surveys for inbound or outbound uses.

Audio Localization Process Explained

Now that you know the business applications of audio localization, you should learn the process behind it. When working with an audio localization vendor, be prepared for the following.

Step 1 – Getting voice samples

Before your audio content can be record, voice talent must be recruited for the project. The company you’re working with should provide you with recorded voice samples. If they don’t, be sure to ask for them. It’s important for you to make a final decision on the voice talent since they will be representing your brand image.

Voice Actor Casting

I’d recommend you go with professional voice actors as opposed to working with individuals who merely speak the language. Working with professionals may seem more costly on paper, but it may also take less time to complete the recording. In the end, you get a better product when you work with professionals. More here on why you should always work with professionals.

Here are a few more things to consider when getting voice samples.

  • How many voices will you need? Your vendor should provide you with voice talent casting options if necessary.
  • What age are the actors? If you are doing voice-overs or have a specific demographic in mind, try to match the age of the on-screen actors or your target demographic whenever possible.
  • Will you need male or female voices? Ideally, you’d want to match a female source voice with a female voice-over in your target language.

Settling on the voices for your final recording is essential. Now you know what to look for.

Step 2 – Localizing the script

Now that you have your voice artists secured, it’s time to localize your script. By having your script localized, the voice artists will be able to read it in the target language. The recorded audio can then be used as a voice-over in radio, television production, eLearning courses and other content types.

Localizing the script

Here is what’s involved in this step.

1. Script Transcription

Before you have your script localized, you must first have it transcribed.

If you already have it transcribed, provide the transcription to your audio localization vendor. If not, either have it transcribed on your end or have your vendor do it.

The transcription should include time-stamps. With proper time coding, you will know exactly where to match source and target language audio. This makes everyone’s job easier!

2. Script Translation

The transcribed text is then translated for audio recording. Your vendor should offer an option of having it translated for audio recording, since translating for audio is different than translating for plain reading. This means using shorter sentences so it’s easy for the voice actor to read and breathe in-between!

Another factor to consider during the script translation is the expansion and contraction of text. If you’re having your script translated from English into Spanish, be prepared for it to expand by 25%. That will certainly impact the length of the audio recording.

If your localized audio recording in Spanish is going to be used in Mexico, Argentina or another country, have the translated script undergo an in-country review. This is an essential quality assurance step. In-country review will assure that the translated content is culturally appropriate and makes sense for the target audience.

Finally, provide a pronunciation guide to your vendor for key terms, especially brand names and acronyms. During the voice-over recording, voice actors will follow your guide to properly pronounce those key terms.

Your vendor should now present the translated script to you for approval. Once you approve it, the vendor can proceed with the audio recording process. Make sure you’re absolutely satisfied with the script. Any changes to the script during or after the recording process will cost you!

Step 3 – Recording the audio

The voice actors have been selected and you approved the localized script. It’s now time to record the audio. Nowadays you can record sound with just about anything from a professional studio recorder to a smart phone.

Since you’ve made the effort in securing professional voice talent and investing in quality script transcription and translation, you’re probably looking for equal quality in the recorded audio. This means that professional equipment must be used to achieve studio-quality sound.

Audio recording in a studio

Your vendor may have a studio in-house or may offer you an option to pay for professional studio time. Either is a good option. A studio will give you access to a sound isolation booth and professional recording equipment. Additionally, you will have access to audio engineers that will assist with the recording and post production.

Step 4 – Post production

Once your audio is recorded, it has to undergo post production. Your vendor will have audio engineers and specialists working on the tracks clean them up and adapt them to your application.

Recording Studio Mixing Console

In this step, the following tasks will occur.

  • Editing the audio voice-over.
  • Cleaning up breathing, lip and other noises.
  • Matching source tempo.
  • Addressing variations in speaker volume, tone and ambient noise.
  • Highlighting the differences between source and target language tone.
  • Adapting the audio track to video or other applications.

These are just some of the essential tasks that take place in this step. There are numerous others tasks specific to your project that will take place as well. It would take another blog article to describe all of them.

Step 5 – QA Review

As the post production wraps up, your vendor should offer a quality assurance review prior to delivering the final product to you. If everything was done correctly in the first four steps, the QA review shouldn’t take too long.

It is also essential to have a QA review to catch anything that may have slipped outside the project specifications. Any mistakes caught in this step can be fixed prior to delivery.

Step 6 – Delivery

Now that QA has been wrapped up, your files are ready to be delivered. Your vendor will deliver the files in a format specified by you. Make sure you outline the file specifications in the project scope prior to starting a project. For example, your phone system IVR may have a different file format and compression requirements compared to an eLearning module.

Are you prepared to invest in quality translations?

If you are unable to integrate the audio provided by your vendor into your final product yourself, they should be able to assist. This may cost you a little more, but might be worth the investment to have it done right.

Need assistance with your audio localization project?

Let’s discuss your specific needs. Contact us.

Conclusion

You’ve now learned about audio localization and how it can be applied in your organization. Having the knowledge of audio localization business applications and the process behind it will set you up for success.

More importantly, it will give you confidence to find a qualified vendor for your project. Feel free to use the information in this article to help you select a qualified audio localization vendor.

Are you ready to localize your audio content in other languages?

Share your experiences with audio localization in the comments.